Posts

Showing posts from 2018

How to restore an old cutting board

Image
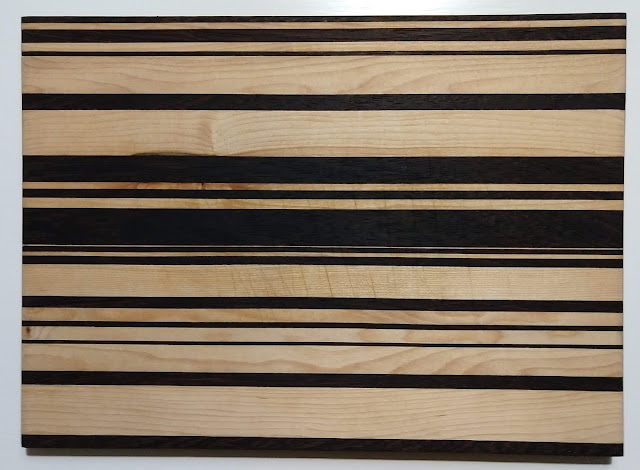
A couple years ago my wife and I bought a beautiful handmade cutting board at an artisan shop in Grass Valley, CA. We were extremely careful with the cutting board, and used it more like a serving board. Unfortunately the first time we washed it with soapy water, the surface took on a rough, uneven feel. It was such a bummer that it seemed impossible to keep the board looking and feeling like when we first bought it. After that we started cutting on it, since it lost its original appeal. Now that I've made quite a few cutting boards myself, I realize what had happened, and I can share a neat little trick to get your wooden cutting boards looking brand new again. Maybe even better than when you bought them ;-P A lesser known step when making cutting boards is vital to getting a long-lasting finished product. After sanding to 180-220 grit, you need to get the entire board's surface damp. This causes the wood grain to raise, and the board will feel rough to the touch. Let

Bedroom Set Restoration

Image
I was recently contacted by a local client to give a facelift to a bedroom set; a dresser and two nightstands. It was a pretty well made set of furniture, but it was definitely showing some signs of wear. The framing was all real wood, and all of the panels were particle board with wood veneer. Since there were some gouges and scratches that went all the way through the veneer, restoring the existing finish wasn't really an option. She wanted to go with something lighter anyway, so we picked out two tones of grey that I think turned out great. Here are some before pics:   I started with the two nightstands, sanded through the original finish, and popped out the top panels. I planned to paint the drawer faces and the top panels the light shade, and the rest of the nightstand would be the dark shade. I ended up keeping the original hardware, since it seemed to go really nicely with the two-tone paint job. Here are the nightstands finished up. And now for the

End grain side table

Image
I had some scrap 4 x 4 pieces laying around, left over from the porch swing I built, so I decided to make a table top out of them. I built a jig to cut a bunch of ~3" pieces of 4 x 4. Once I got all of the pieces cut, I glued them up in a 4 x 5 rectangle. The pressure treated lumber was still damp to the touch, so I left them clamped for almost a week. I lined the pieces up pretty well, but there were definitely some ridges along the seams. I don't have a planer wide enough for this, so I leveled it out with a belt sander. Once I got it pretty level, I went over it with a 100-grit orbital sander, then a 150-grit 1/4 sheet sander, then hand sanded with 150-grit, 220-grit, and 400-grit. I made some stainless steel legs, and painted them black. I didn't take a picture of them, but they looked pretty similar to this set. I attached the legs, and oiled up the top with  Natural Danish Oil . For a table made of scraps, I think this turned out pretty cool. Th

Walnut Live Edge Coffee Table

Image
I finished up my first live edge table, made from a solid slab of walnut! It started as a rough-cut slab with a few cracks and imperfections, but I could tell as soon as I saw it there was some beautiful grain beneath the surface. I got it roughly level and smooth before filling any cracks with black epoxy. Then it was back to sanding, sanding, and more sanding... I sanded down to 400 grit before applying some Danish Oil, natural. Man, did that grain pop! I did 3 coats of oil in total. While the table top cured, I welded together some stainless steel legs. Because of the shape of the top, I made one leg more narrow. I was worried the different sized legs would look out of place, but ultimately I think it helps it look like a custom piece of furniture. The legs got 4 coats of semi-gloss black paint, and I mounted them on the underside of the table. Here's the final product! This was a really fun project, and I l

Porch Swing

Image
I built this porch swing because my wife wanted a place that we could sit and watch the kids when they're playing in the front yard. It's not as comfortable as I would have hoped, but I think it turned out great for the space. The framing is built from pressure treated lumber, and the bench slats are made from pine. I made the frame first, from 4x4's and some 2x6's for support. I used 8" bolts to connect the 4x4 pieces, which actually felt like it would have held together without any lumber for structural support. I didn't want to risk my wife and I falling on our rear-ends the first time we sat in the swing though :-P  To make the bench, I freehand drew an 'S' curve in a 2x6 to create the shape I wanted in the bottom of the bench. I made two more copies of that to provide the frame for connecting the pine slats. It just so happened that the other side of that 'S' worked out for the back of the bench. I connected them with 2

Epoxy River Coffee Table

Image
There are lots of people out there making some amazing epoxy river tables that sell for thousands of dollars. They generally use live edge slabs of specialty wood that can cost $1000+ alone, not to mention the tables sometimes contain $500+ of epoxy as well. I wanted to try to make a low-cost version of one of these amazing tables. I spent: $16.00  (2) 2" x 6" x 96" fir construction lumber $28  (2) 1/8" x 2" x 72" flat steel ~$17.50  32oz of a one-gallon kit 2-part epoxy ~$15  finish, paint, screws, etc. That brings me out to a total of roughly $76. First I used a biscuit joiner to align and glue (4) 4-foot lengths of the construction lumber together to form the table top.  I let the glue dry for a few days before taking it out of the clamps, and filling any remaining gaps with clear epoxy. I put some parchment paper down between the center support to prevent the epoxy from sticking. The center support board is to prevent the ta

Kitchen Island Renovation

Image
I started with an old record player cabinet that I picked up on Craigslist. It was pretty cool to see this transform from a heavily  used, partially broken pile of wood in someone's storage unit into a functional and modern kitchen island. I'm sure that at some point, this thing was beautiful. It was made of solid hardwood, and it had pretty nice hardware, but the years had not been nice to this cabinet. Rather than trying to save the wood, and sand through all of the layers of varnish and stain on this thing, I went the easier route and painted it. I took all of the hardware off, removed the doors, took out some of the odd interior shelving, and sanded everything just enough to get a nice smooth surface. I painted the cabinet and doors a bright white, and applied a satin clear finish over the paint. I added some new black hardware, and a butcher block top I made from 2x4's.  I think the black and white look great together, and I was surprised at how nic