Epoxy Art - Punisher
This is an awesome way to add a color theme, and give a custom art feel to your home. I'm making this one for a military friend and it will probably end up in his glass blowing shop, but you really can't go wrong with playing with colors and designs.
The supplies I used for this were:
- Particle board from broken bathroom shelf
- 1/4" x 1-1/8" moulding from Home Depot
- Wood glue from Home Depot
- Pro Marine Supply 2 Part Epoxy (~24oz, 12oz per coat)
- Black, white, and red color pigments from Just Pigments and Black Diamond
This particular board came out of a cheap bathroom shelving piece similar to this one from Walmart (White Bathroom shelf), that warped and broke after a couple years.
I added some wooden trim around the edges to make this look a little thicker, and also to allow you to hang it on the wall. You could skip the trim, and put a simple picture hanger on the back.
I puttied all the holes from the nail gun, and any cracks and crevices that I thought the epoxy might struggle to fill. I round the edges from the top side to allow the epoxy to run smoothly over the sides and create a seamless transition all the way to the bottom of the sides. Of course, with epoxy you want to make sure your surface is as level as possible so you get an even coat. Note, be sure to check in all directions!
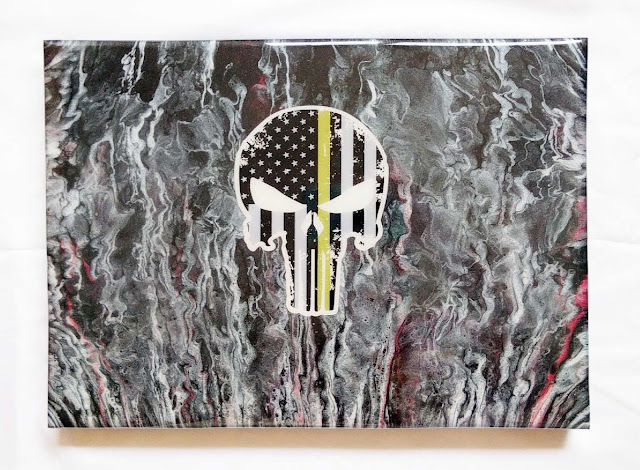
It looks a bit messy in the picture, but I think this turned out pretty cool. I was going for a bit of a smoke rising look with the white and black, and the hints of red help break it up a bit. I think the Punisher decal is going to look great once this sets.
After I finished playing with the epoxy, I let it set for at least 24 hours, then applied a veteran Punisher-style decal. This could be a fun project to let kids get involved with, since you could put down any vinyl decals or stickers you want once the first coat of epoxy is dry. I'll be pouring another coat of clear epoxy over the decal. One thing to watch out for with stickers under epoxy, is if they aren't very adhesive or if they absorb moisture. With cheap stickers you sometimes get the edges peeling up as the epoxy top coat sets, or the color of the sticker changes as it absorbs moisture, and it just ends up looking kind of bad. My advice would be to use vinyl decals or higher quality stickers that really stick when you put them down. The more the sticker feels like paper, the more likely you are to see the above problems.
It's always fun to do a project and have someone in mind for it from the beginning. I think he'll be pretty happy with how it turned out! Here are a few pictures of the final product.


Comments
Post a Comment